Project setup in Eclipse
Instructions are provided here for each of supported build tools: Ivy and Maven.
If you don't want to use any of these, follow the instructions for Ivy, they include more manual steps.
To setup your RESTX project inside Eclipse with Ivy support you will need to:
- install IvyDE
- create and configure the project
- enable and configure annotation processing
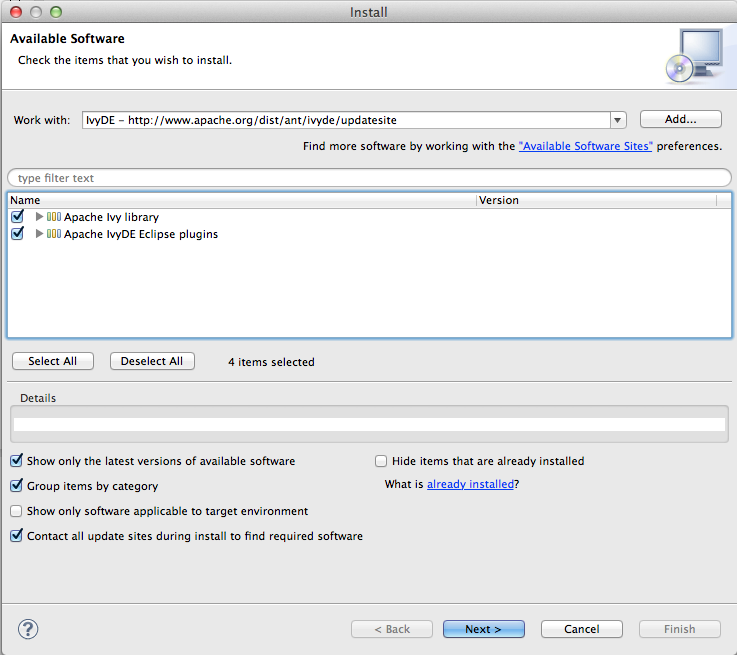
Install IvyDE
First you need to install the IvyDE plugin in eclipse if you don’t already have it.
To do so, use the Help -> Install new software action, add the IvyDE update site http://www.apache.org/dist/ant/ivyde/updatesite and install the IvyDE plugin.

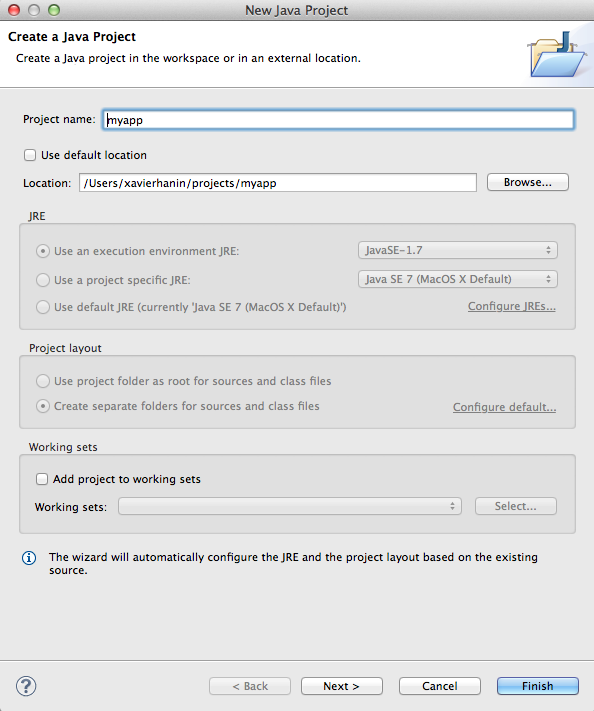
Create and configure the project
First use New -> Java Project action to create a new Java project, and select the location where you have created the project.
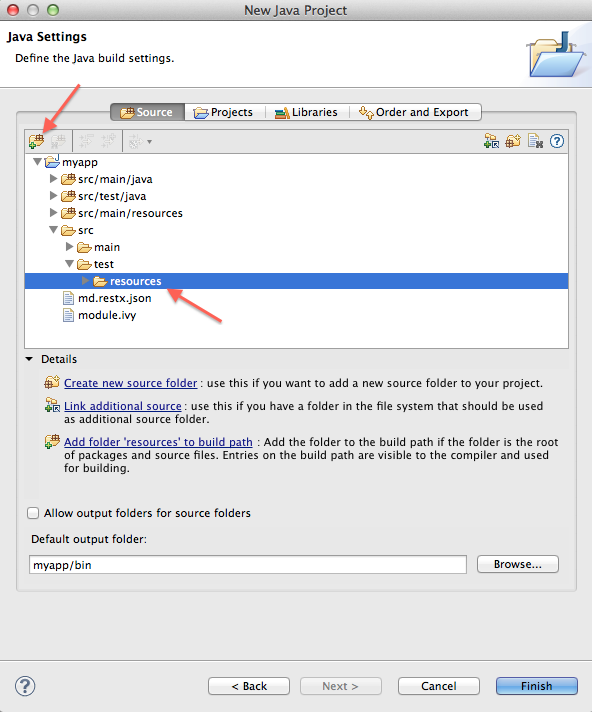
Then configure the source folders. Eclipse should detect src/main/java and src/test/java, you will need to add src/main/resources and src/test/resources manually:
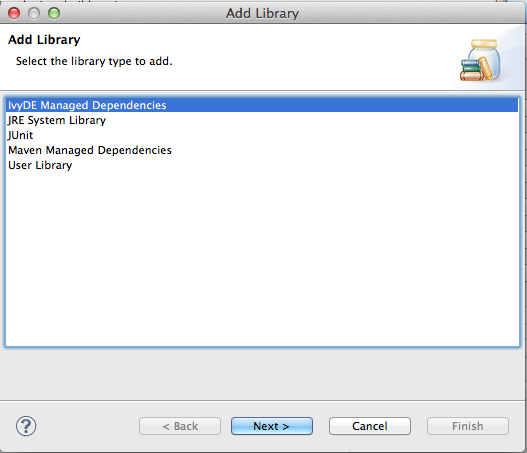
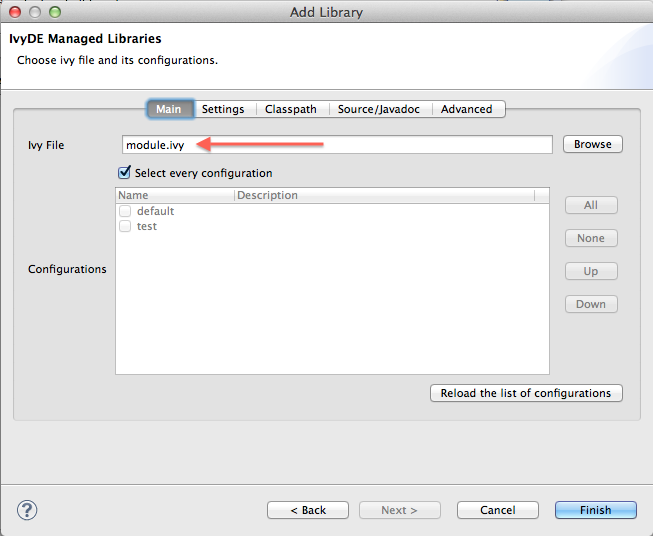
Now open the Libraries tab and add an IvyDE Managed Dependencies library, selecting module.ivy as Ivy file:
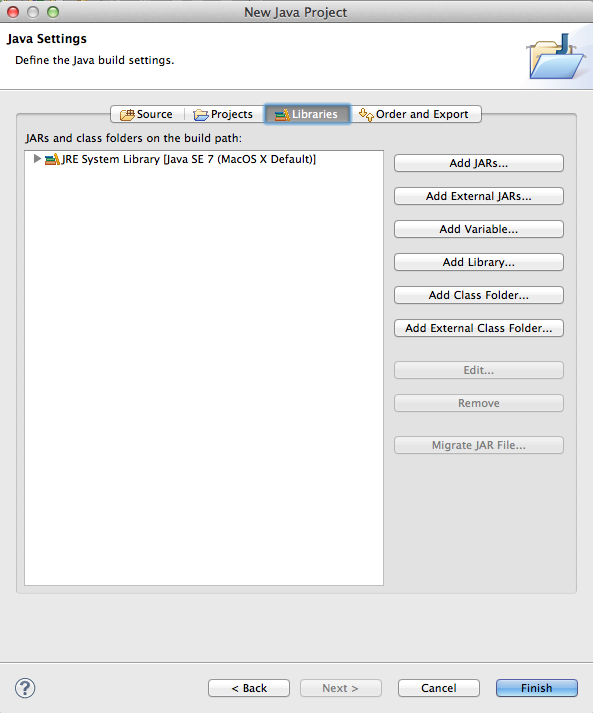
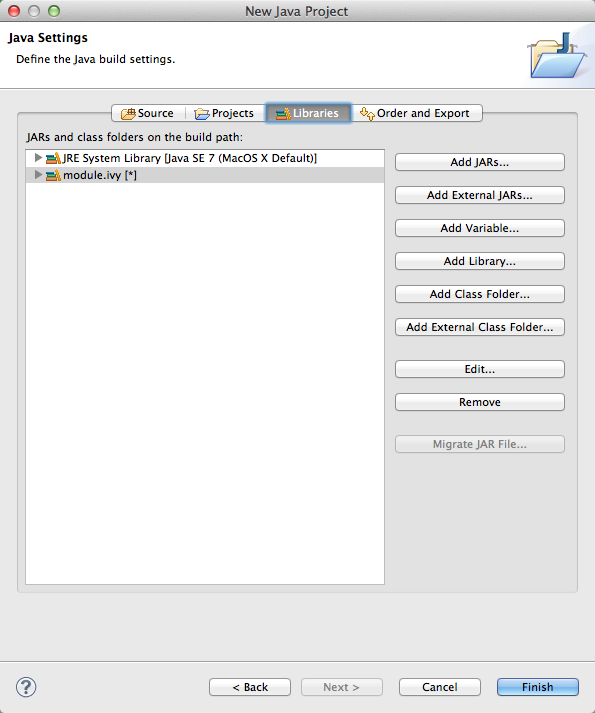
You’re now ready to hit the finish button!
Enable and configure annotation processing
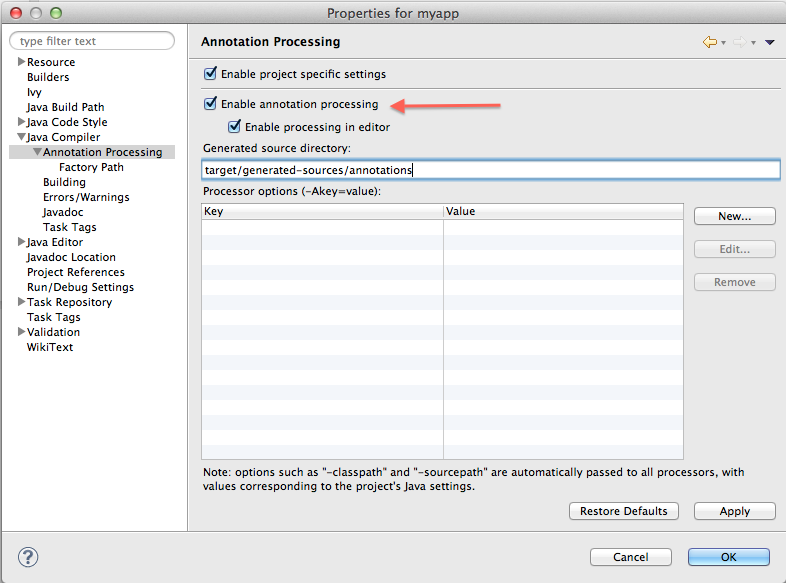
The last step is to enable and configure annotation processing. Open project properties, and the go to the Annotation processing entry. Enable annotation processing and select the detination folder (we recommend using maven conventions, target/generated-sources/annotations).
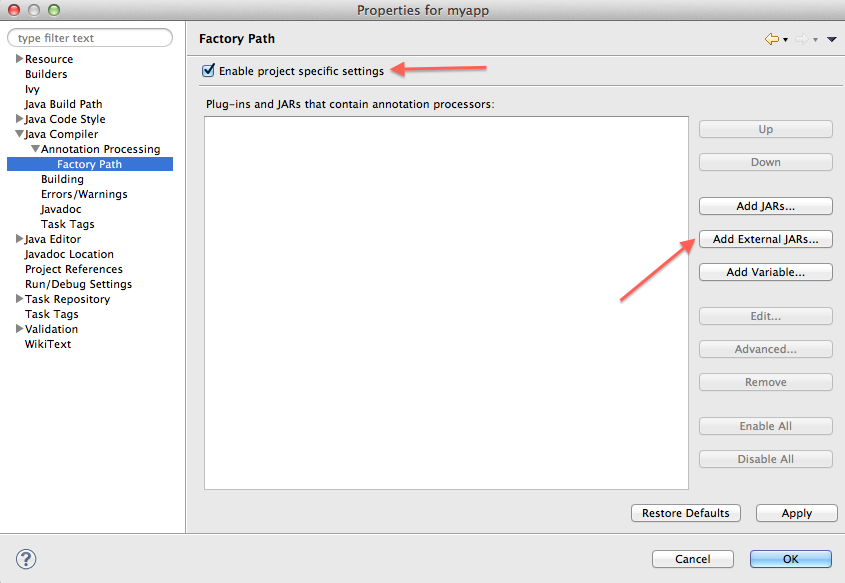
Then you need to configure the factory path for eclipse to discover the annotation processors. Eclipse does not allow to use the classpath for that, but RESTX provides a package containing everything needed for annotation processing in a single jar.
You can download it here: http://repo1.maven.org/maven2/io/restx/restx-annotation-processors-package/1.0.0/restx-annotation-processors-package-1.0.0.jar
Then add it to the annotation processing factory path:
Your project is now setup, you’re ready to start coding!
If this is your first time with RESTX and followed this doc with the generated app, you probably want to try it out now!
If you have chosen to use Maven and have generated a pom for the project (or hand written one following the provided instructions), then you can use Eclipse Maven support (through the m2e plugin) to import the project.
What you will need to do:
- setup maven annotation processing in preferences
- import the project as a regular maven project
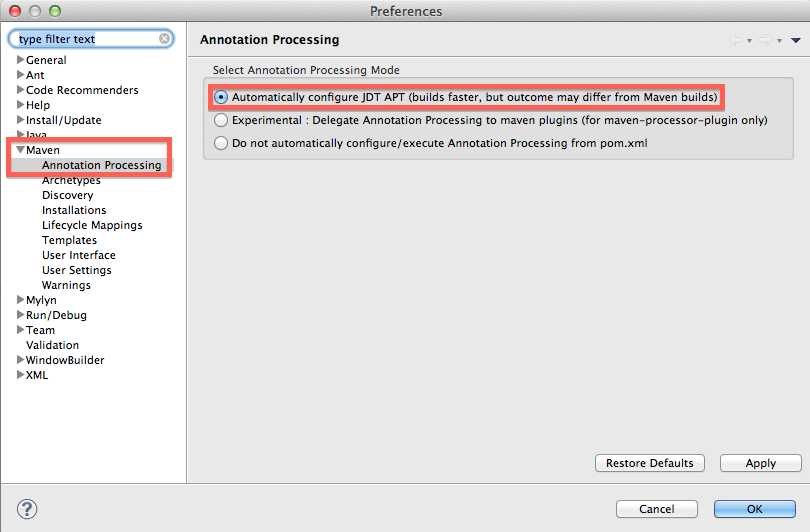
setup maven annotation processing in preferences
Open eclipse preferences, go to Maven -> Annotation processing and select Automatically configure JDT APT:
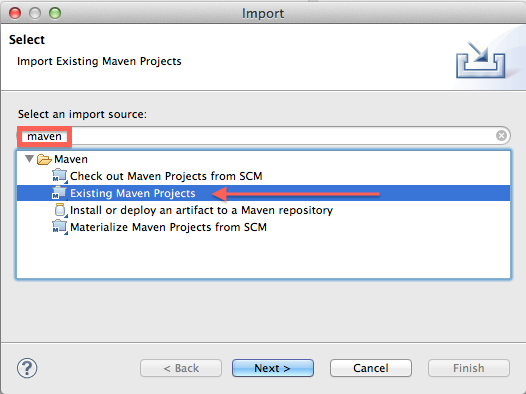
import the project as a regular maven project
Use the File -> Import menu and choose Existing Maven Projects:
If this is your first time with RESTX and followed this doc with the generated app, you probably want to try it out now!