Project setup in Intellij IDEA
Instructions are provided here for each of supported build tools: Ivy and Maven.
If you don't want to use any of these, follow the instructions for Ivy, they include more manual steps.
By default restx shell generates an Ivy file for your project, here are the instructions to setup your IDE with the corresponding project.
You will need to:
- create a new project
- enable annotation processing
- setup IvyIDEA
- setup source paths
create new project
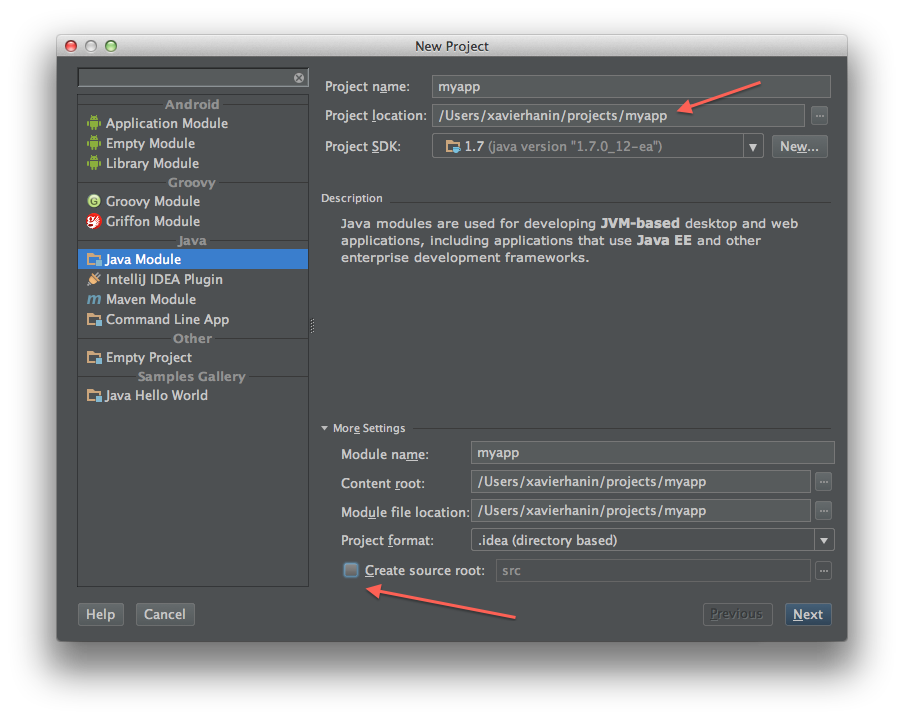
First you need to create a new project in IDEA using the File -> New Project action.
Then select the directory where the app was created, and uncheck the “create source root” option in advanced settings:
enable annotation processing
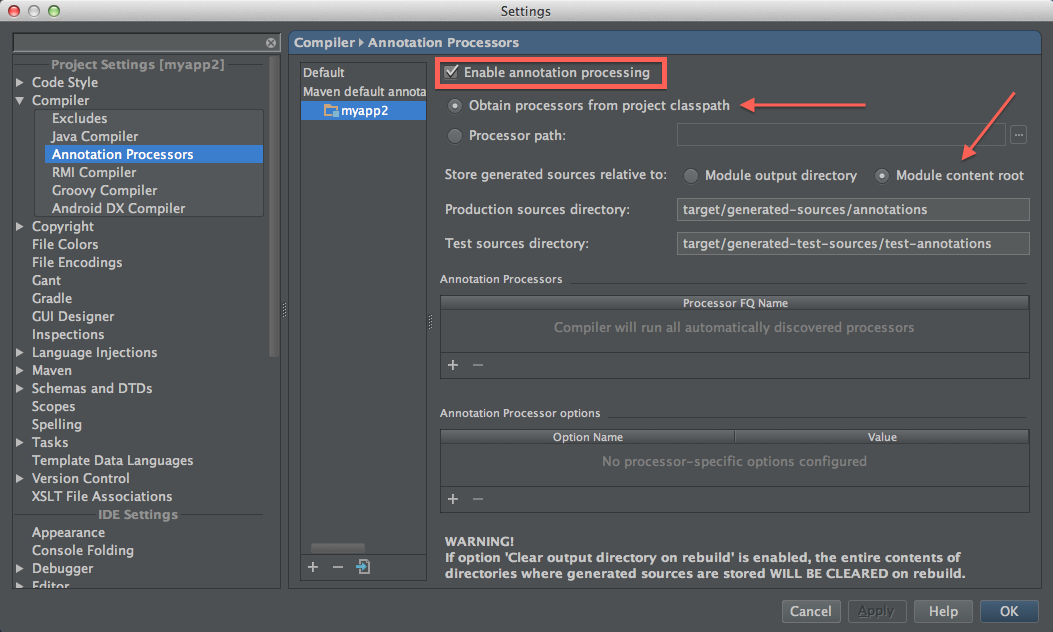
Then you have to enable annotation processing for the project by going in the settings, go to Compiler -> Annotation processor and check the Enable annotation processing option when you select the project.
We also recommend to move the generated sources relative to module content root, and name the folders according to Maven conventions:
target/generated-sources/annotationstarget/generated-tests-sources/test-annotations
Make sure you select the option from classpath:
setup IvyIDEA
Then you will need to setup IvyIDEA, the plugin for IDEA to get support for Apache Ivy.
First you need to install the plugin if you don’t already have it. Open IDEA settings, go in Plugins section, choose Browse repositories and select IvyIDEA.
Once installed, you will need to add the IvyIDEA facet to your project:
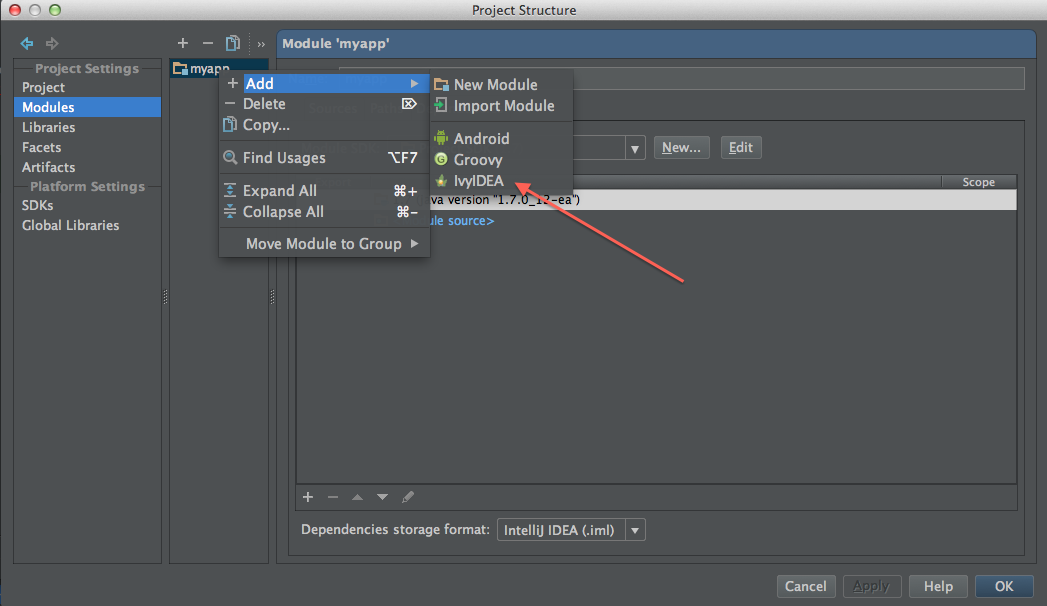
Then you should be able to resolve the dependencies declared in the module.ivy by right clicking on your module and choosing IvyIDEA -> Resolve for all modules.
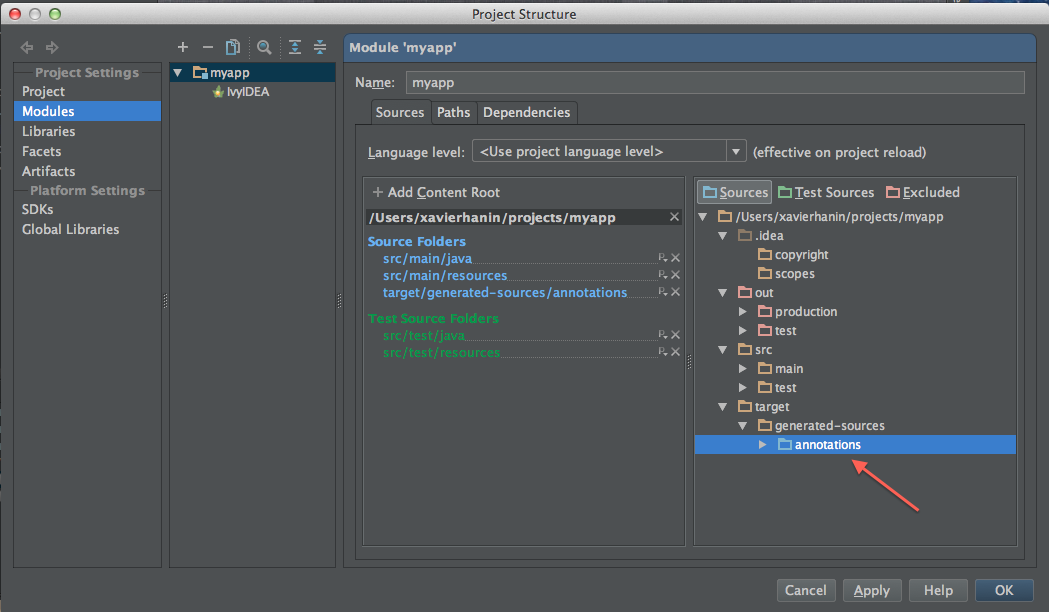
setup source roots
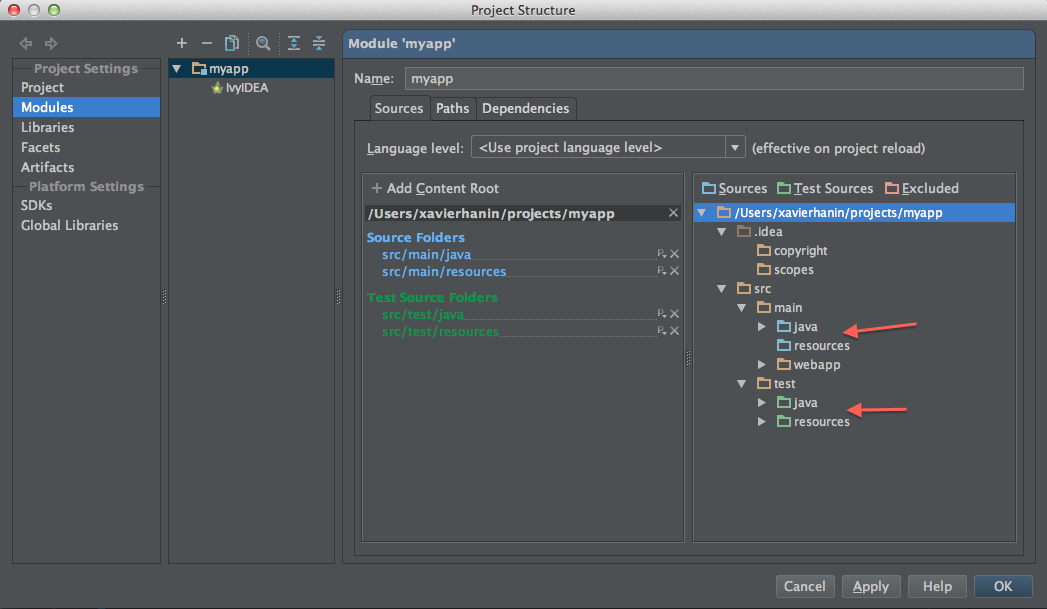
You’re now ready to setup the source paths for your project. Open the project settings, select the sole module in the modules section, and add src/main/java and src/main/resources as source roots, and src/test/java and src/test/resources as test source roots:
Then you can launch a build with Build -> Make Project. You should see the generated sources in the directory you selected in annotation processors settings.
Your IDE is ready, still we recommend to add the sources generation targets as source roots so that you can easily browse them:
You can start coding now, enjoy!
If this is your first time with RESTX and followed this doc with the generated app, you probably want to try it out now!
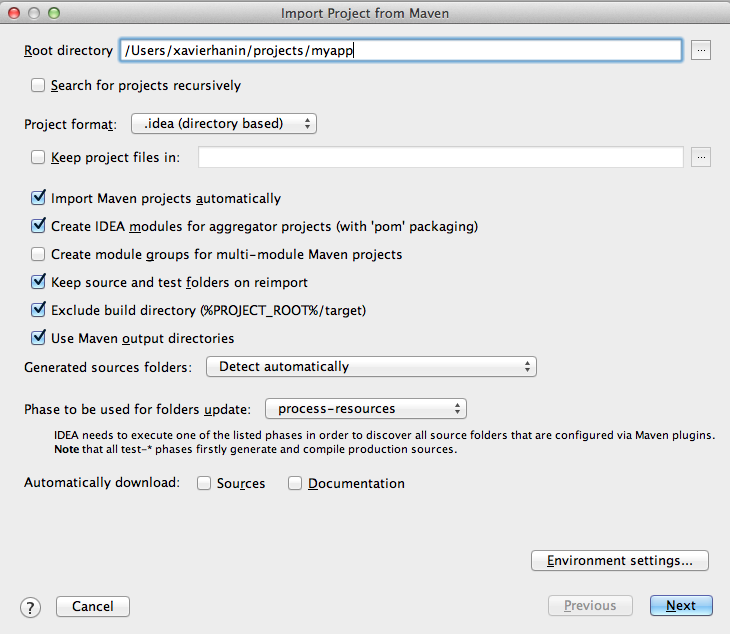
If you have chosen to use Maven and have generated a pom for the project (or hand written one following the provided instructions), then you can use IDEA built in Maven support to import the project.
If you have installed idea command line launcher (through Tools > Install Command line launcher), you can simply run idea pom.xml in your terminal.
What you will need to do:
- import the project
- double check the annotation processor settings (optional)
import the project
Use File -> Import Project and selects the pom.xml of the project. Then import the project with your preferred Maven options:
double check the annotation processor settings (optional)
You may need to double check the annotation processor settings to make sure it is enabled, use annotation processors from classpath, and preferably generate the sources in a folder relative to the module content root (so that you can easily see the generated sources):
If this is your first time with RESTX and followed this doc with the generated app, you probably want to try it out now!